
This is a continuation of this post.http://www.susansewsdaily.com/buttons-buttons-buttons/ 
When I made these pants I thought that a black knit top with some button detail on the sleeve would be smashing! I love buttons! and i love to use them as interesting embellishments on my garments. These pants screamed for a quiet top with some not so quiet details.
I cut out the top and envisioned it finished..
In order for the knit sleeve to support the buttons, I interfaced and then hemmed the sleeve. Then I set up my beautiful shiny, red Janome 770o to sew on the buttons.This is something this machine and most machines can do easily. I sewed on three buttons and CLUNK!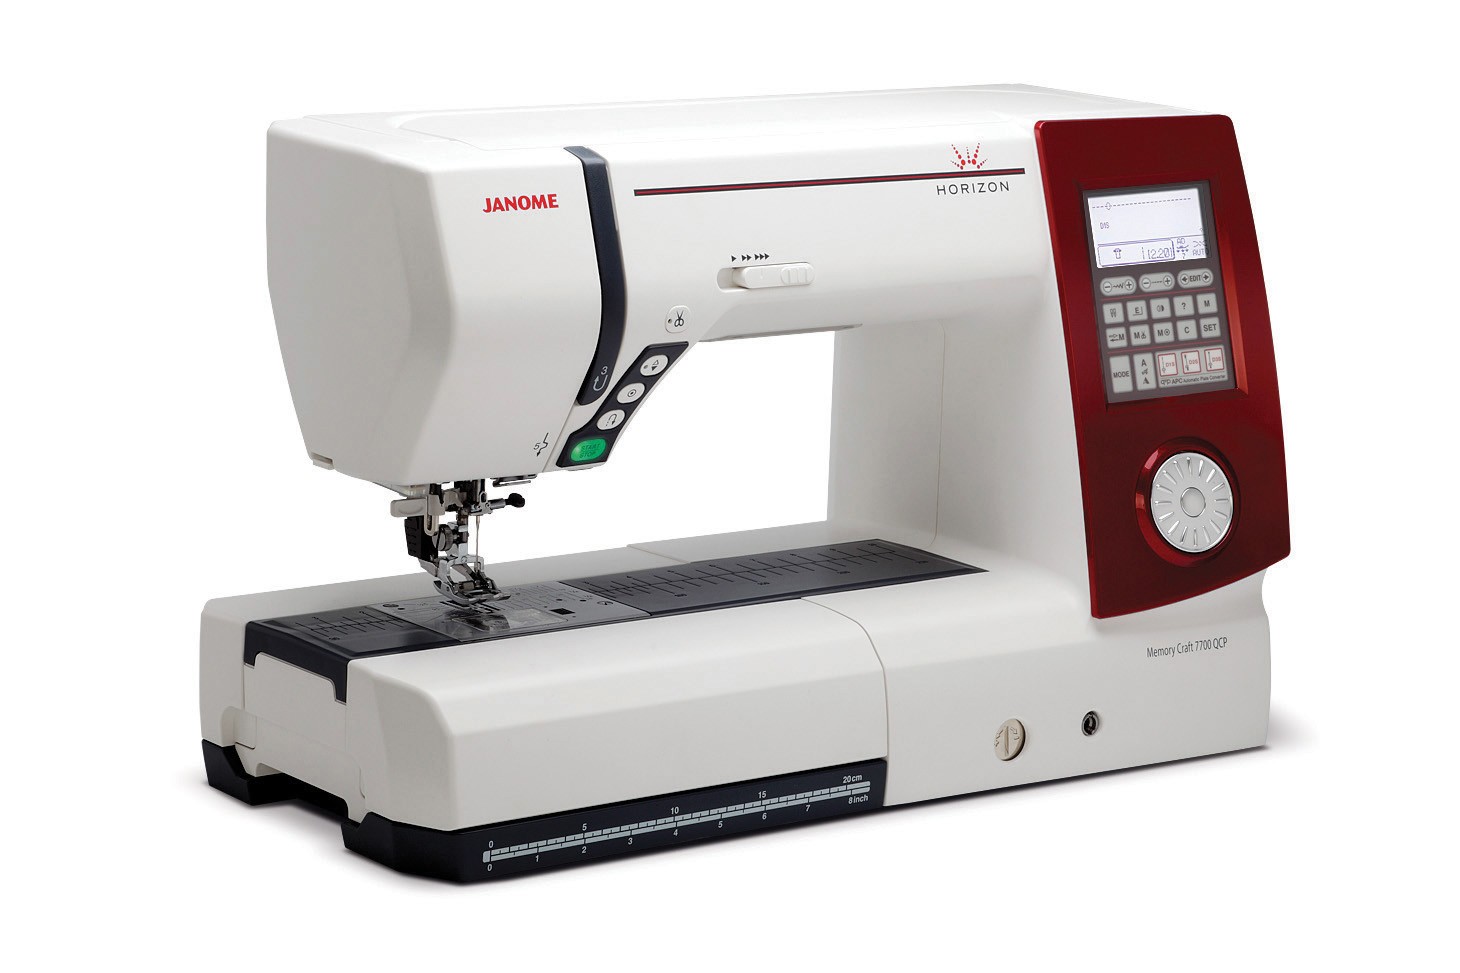
It felt as if the needle was hitting something or that the needle bar was bent. After a lot of fiddling with it. I determined that the timing was off and the machine needed to go to the shop.
My wonderful neighbor, Bev offered her little Kenmore to me to use while the Janome was in the shop.
“But when I used it yesterday, she said, it would not go in reverse.”
I said it didn’t matter and perhaps I could even fix it.I took it out of the case. set it up. It sewed three stitches and never sewed again!
Oh! The language. The frustration! You do not want to know.
Since my trusty Singer 301a was in the shop and had been there since before Christmas and would not be ready until the end of this month I was heartbroken. I knew that this machine would be gone for a long time. And now the Kenmore did not work. I had managed to get half of the pink buttons sewn on by machine. But I had to finish them by HAND!

My inspired idea. If sewn on by machine, quick and easy.
I have a Babylock Imagine serger. This is also a wonderful machine. I had never used it to sew a knit garment.But I decided that I would use my serger to make this top. This meant completing the button sewing first. I patiently sewing all of those buttons on two sleeves by hand. I thought that I had placed the buttons on the sleeve with enough room for the hefty presser foot fo the serger to sew. Here is what I had planned. Lots of different color, size and texture. gorgeous , right? And if sewn on by machine, quick and easy.
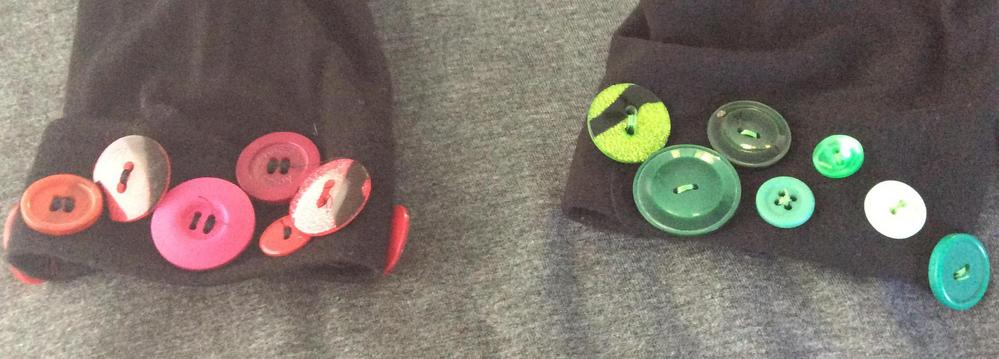 I patiently sewed the buttons on both sleeves. Remember, I said that I left enough room to stitch the sleeve closed…
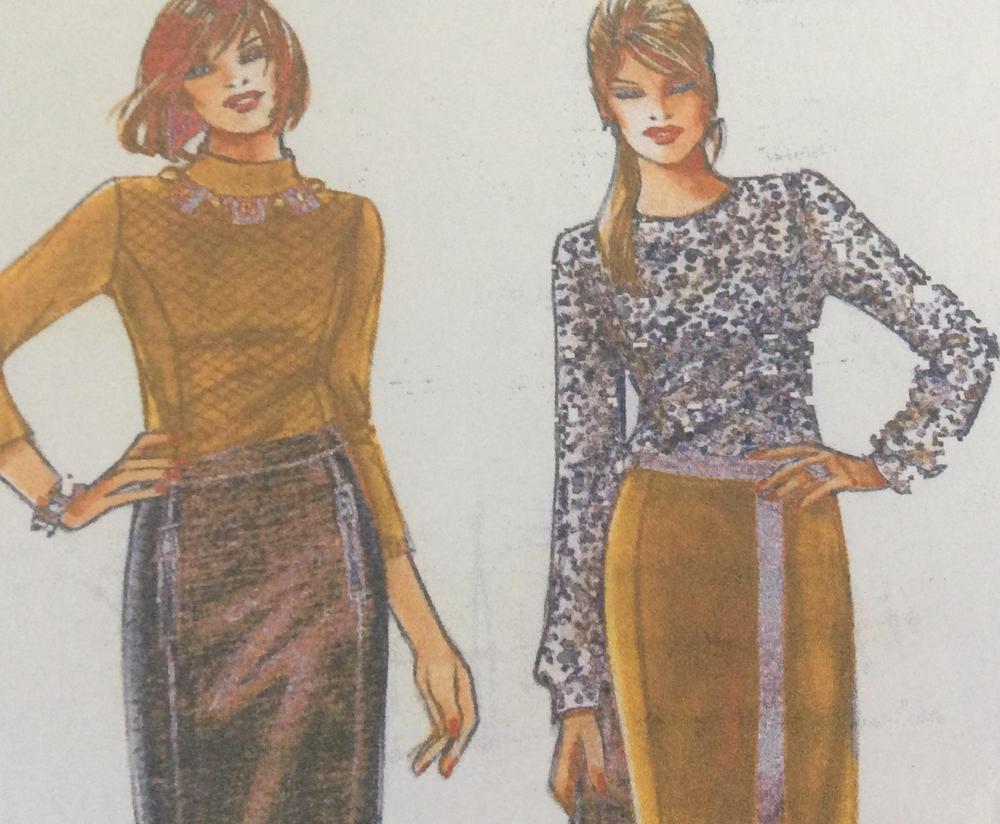
My princess line pattern. I made the top on the right, changing the neckline to a deep Vee. and substitution narrower and flat hemmed not cuffed sleeves.
I set up the serger for four threads. Threading needles for me is very difficult. Until I have my new scleral contact lenses, threading a needle is painfully slow. Threading TWO serger needles even worse. But I did it! And my serging went along beautifully. My top is a princess line, and yet the serger sewed the curve without a hitch. The first sleeve went in smoothly. Sleeve number two for some reason just did not fit. I held up the top and realized that I had serged the sleeve to part of the side seam. Have you ever ripped out a four thread serged seam? On knit? On Black? With vision issues? A root canal or two would have been more fun! I was able to remove the sleeve, set it up to be sewn and…DID THE SAME DAMN THING AGAIN! I was going to toss the top and just give up. But I looked at my lovely cuffs of buttons that I had patiently sewn on by hand, and decided to whack the sleeve off and sew it correctly or die!
And just to irritate me and add to my feelings of uselessness, my supposed Guardian Angel Suz, with the dented halo and messy hair was floating on some tinsel and humming as she meticulously ( well meticulously for her) sewed golden buttons all over her not so pristine white angel dress.
I managed to get the sleeve done right. Now all that was left was to close the sleeve and side seams. As I folded the sleeves right sides together, I realized that I had not left enough room for the serger’s beefy presser foot. I tried on the first sleeve, but the serger refused to cooperate. so I snipped off a button on each side. Not as impressive as I had imagined, but still nice.
 With all of that hacking and snipping and serging. My sleeve cap was, well, mangled.I tried on the top. It didn’t look bad. And I had invested half a dayin a two-hour job. Only I or you if you were right here with me, could see that there was a little something off on one sleeve.
Then I took a gander at the back. It gaped.
“Well, OK” I thought ” I can fix that on the serger I will just take it in on the center back.”
And that I did. But the seam is on the RIGHT SIDE.
Usually never any help at all.( I do not know why she is my Guardian Angel. Suz suggested a row of buttons down the back to cover the offending seam.And that is what I did. But I only did that on Friday.
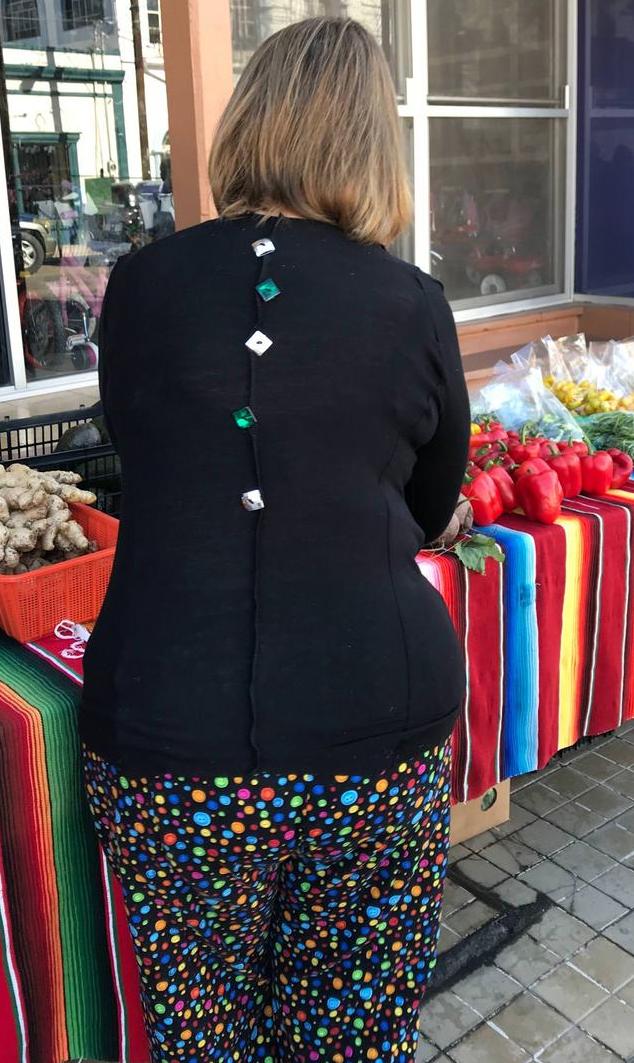
They are the same button reversed, one side green, one side silver.Since I can and do plan to wear this top tucked in, I did not go all the way down to the waist with the buttons.
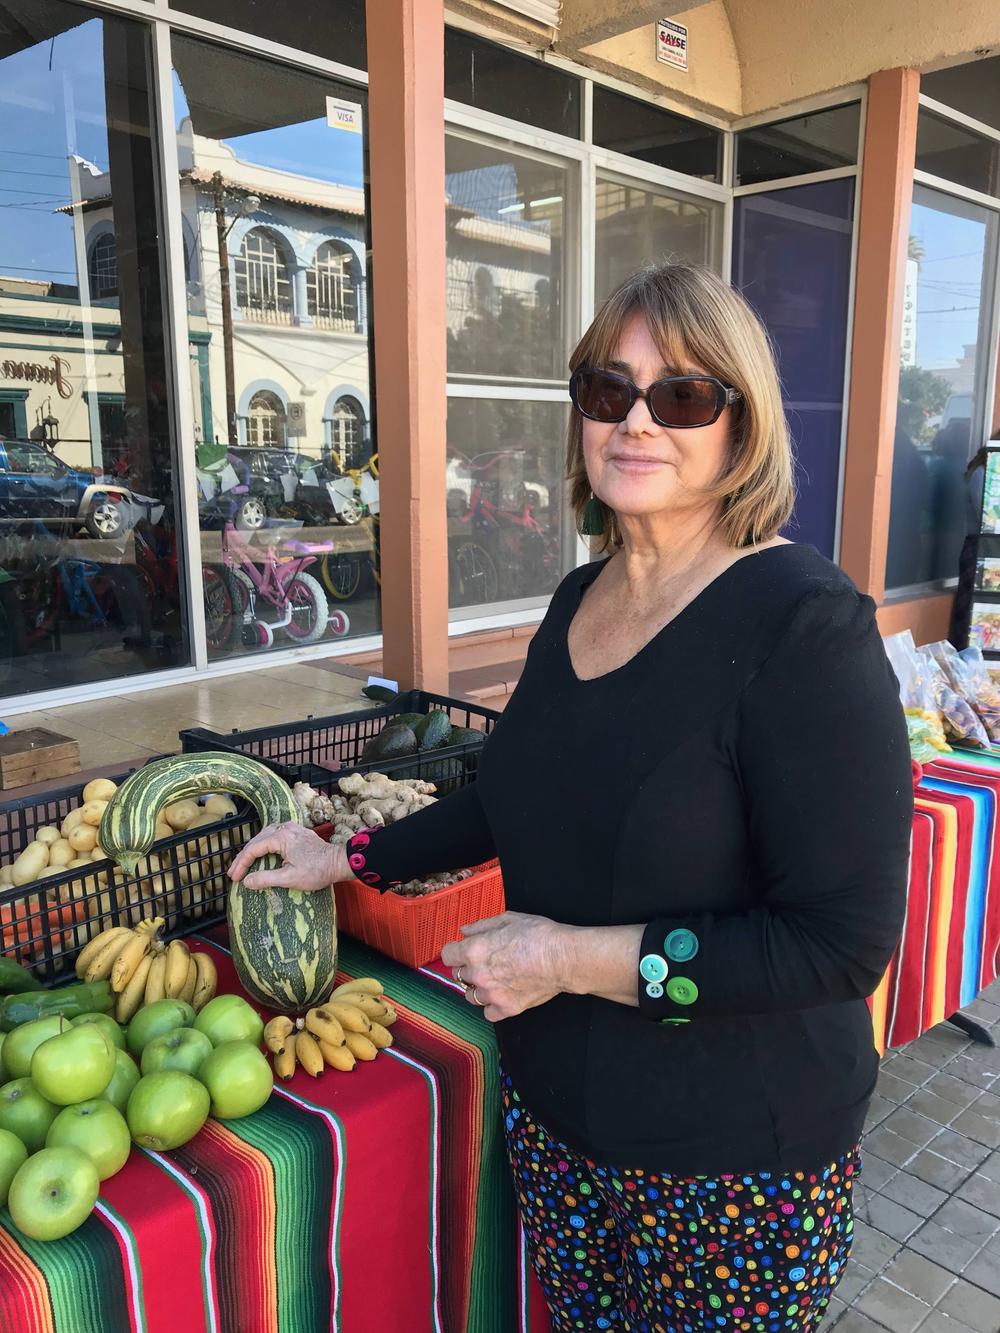
And because I feel pretty, and trim and stylish and it is ONE BIG SQUASH here is another photo!

 And now it’s time for coffee…


10 Comments
Mery
January 8, 2018It’s a pretty top with lots of charm. Your ideas are great, and I thoroughly enjoy your writing style and attitude. The decorated back seam looks like a designer intentention. I feel your frustration and am glad you conquered that top. You’ll enjoy wearing it and everyone who sees it will enjoy the look.
I use the same coffee cup! I have only one left and haven’t seen one in thrift shops for years. I even wrote World Market singing it’s praises and asked that they consider re-issuing it.
It’s a bitch when the ol’ body doesn’t cooperate. It’ll get better, much better.
Susan Fogel
January 9, 2018Thank you Mary for visiting my blog!
We love that coffee mug. My son and daughter in law gave us two. When my husband was in the hospital i brought my carafe and mug with me. A day or two later we realized that it got left behind! If you ever find any more, please let me know!
hmfoster
January 8, 2018Thanks for the grins this morning over my first cup of Lavazza coffee. Really like the outfit and the EFFORT. Super -duper idea re putting more buttons on the exposed seam. With a bit of mutates mutandis not only does the outfit look stunning also YOU dahling.
Susan Fogel
January 9, 2018Well, Dahling, I do feel great in it. Knits and my Lutterloh patterns are forgiving.
Thank you for visitng, commenting and sharing my blog.
Besos,
S
Melissa
January 9, 2018Susan, you have five it again! Your top is awesome. I never would have thought you had any troubles with it. Every detail is perfect!!!
Susan Fogel
January 9, 2018Melissa!
Thank you ! I love the top, and I just ignore the less than perfect sleeve.
What are you sewing? Still quilting?
Victoria Line
February 4, 2018Oh Susan, what a tale of woe. I feel your pain having had THREE failed buttonholes on a dress I have finaly decided to finish. The top turned out well and I love the pretty button detailing you have applied.
Susan Fogel
February 4, 2018My dear Amiga!
I just packed up the Brother in it’s original box, and my Janome is sitting on my desk ready to go! Thank you for the compliment! So glad that you have decided to finish that dress and get it off your back!
Nancy Linn
February 4, 2018Hello Susan,
I am brand new to Lutterloh patterns. I’m having trouble figuring out the princess seaming. The diagram looks like darts but without the slashed lines. Do I just cut them out and add seam allowance or do I actually sew them like darts? I’ve looked for instructions online but with no luck. Any help you could give me would be appreciated.
Nancy
Susan Fogel
February 13, 2018Nancy,
Hola ! Sorry to be so late in getting back to you. I will send you an email.
Leave A Response To Melissa Cancel reply