
As the group administrator for the Lutterloh Systems closed group on Facebook, I see lots of comments and questions from new and experienced users. And from those that are afraid to get started because “…there are no instructions with Lutterloh patterns…”
I have even used those words in my reviews of garments I have made. When I am making that statement it is in response to a cue about the quality of pattern instructions in a template for reviews on Pattern Review.
As of today I am amending that statement!
No there are no guide sheets with step by step written instructions accompanied by illustrations. But there are definitely instructions on the individual pattern pieces themselves. All it takes to have a successful sewing adventure with these patterns is to study the pattern pieces, match the letters and symbols to the symbols gude that is in every basic binder and attached to every fashion supplement.
Here is that symbols list:
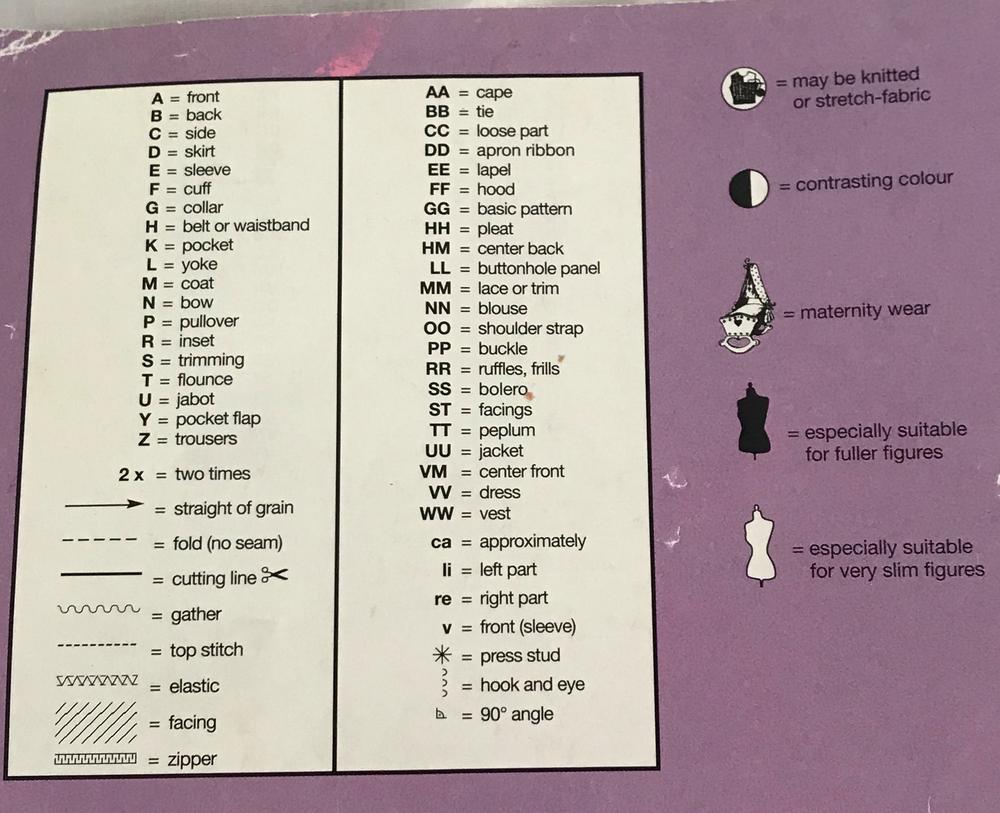
This comes in several languages
So you can see that the symbols are easy to read and in English. The page that comes with my supplements are printed in four languages.
Now here is the fashion illustration of a Lutterloh pattern that I just completed. Please look at the waist ties. I was not completely sure how they would attach. I discussed this with a friend and we thought that perhaps there might be a casing. But if you look closely there is no stitching line on the fashion illustration that would indicate that a casing was suggested.
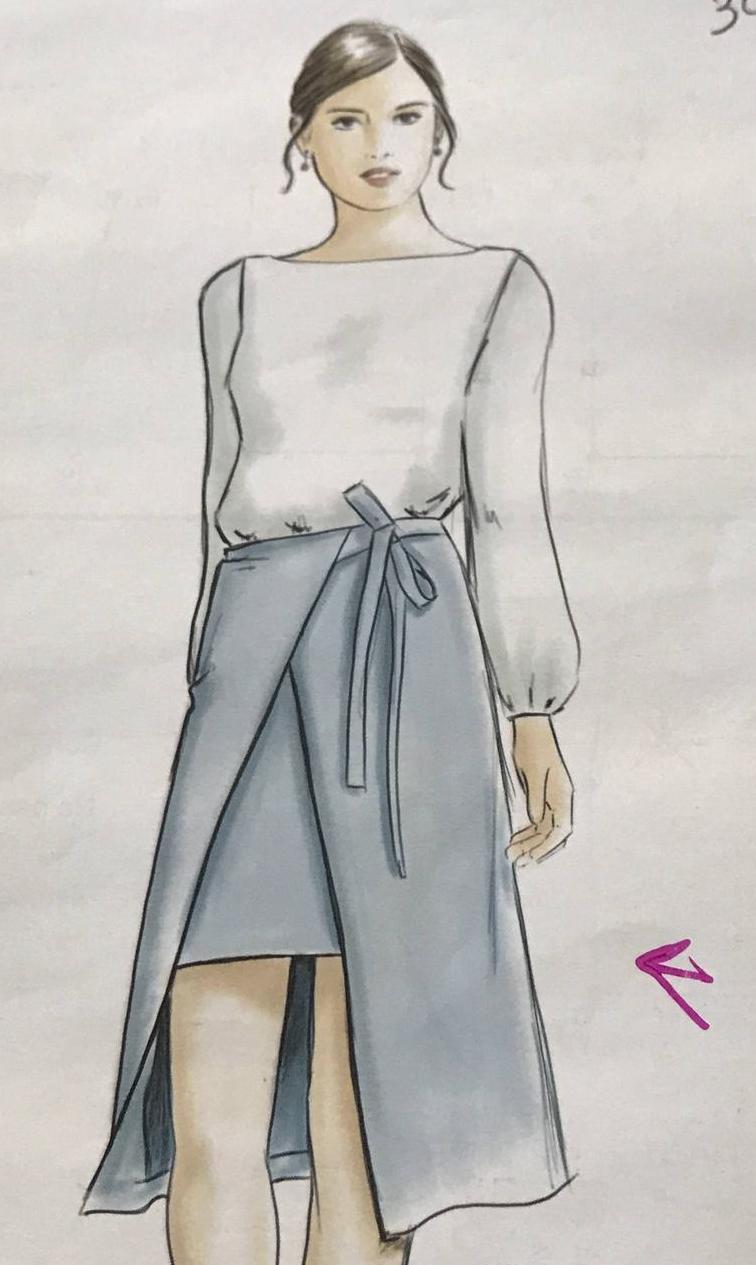
I thought about how I was going to attach the ties to achieve a nice clean look.. Then I decided to take a closert look at the actual pattern pieces. The pieces consisted of a front, a back and two ties. The ties are to be made to the same measurements. ” So why two?” I asked.
And I studied the front piece closely. then the back piece, then back to the ties. I was obviously missing something here, but could not figure out just what I was missing.
“Hmmmm”, said I. “Hmmmm” said Suz my feminist and not so sweet guardian angel with the mesyt hair and the dented halo. She isn’t always original in thought an deed.
“Is that all that you can do, is mimic me, Suz?” I not so nicely asked.
She slipped her hand under her crooked and dented halo and tapped the side of her head and raised her eyes as if deep in thought. What she meant was “THINK! THINK! THINK!”
And I did spend more time thinking, and also studying the pattern pieces.
Let’s take a look.
Here are the two main pieces of the wrap overlay
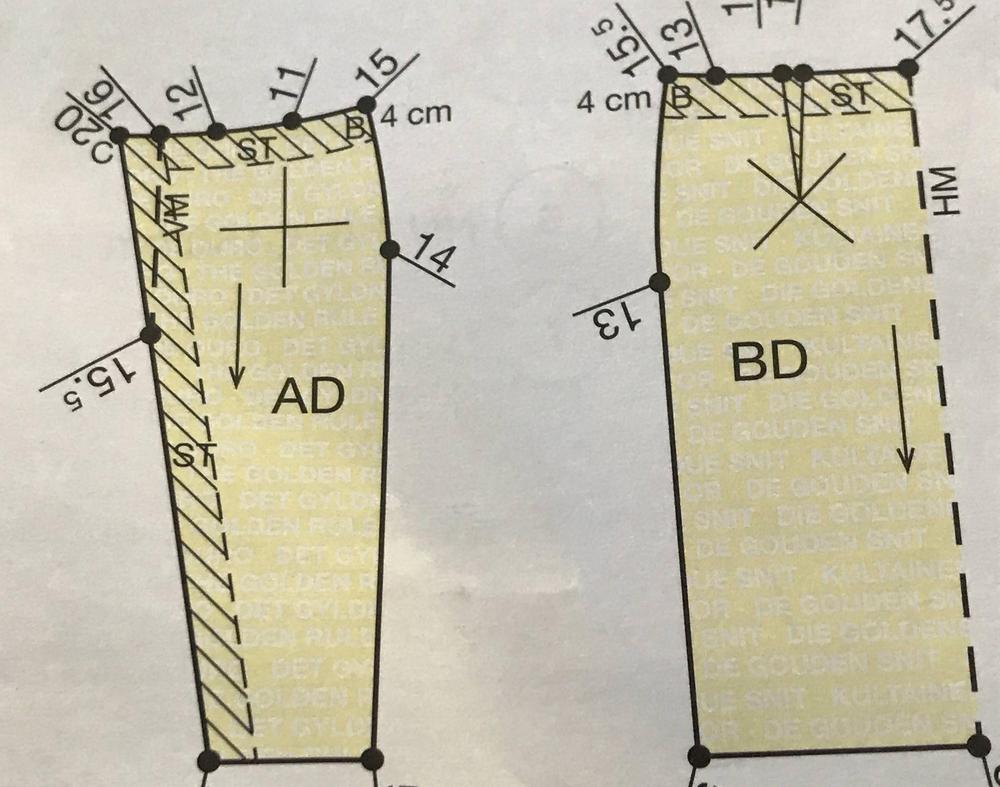 The skirt front as the symbols list tells us i piece AD. A for front. D for skirt. The back is B for back and D for skirt. Easy peasy.
Now look closer at the waist at each edge of the front you will see the capital letters C on the left and B on theRight. Do you see them? Good. Now on the back is just the capital letter B.
So far so good. We have identified the skirt pieces and we found those two letters. C is for side.
Now let’s look at the two pieces for the tie ends.
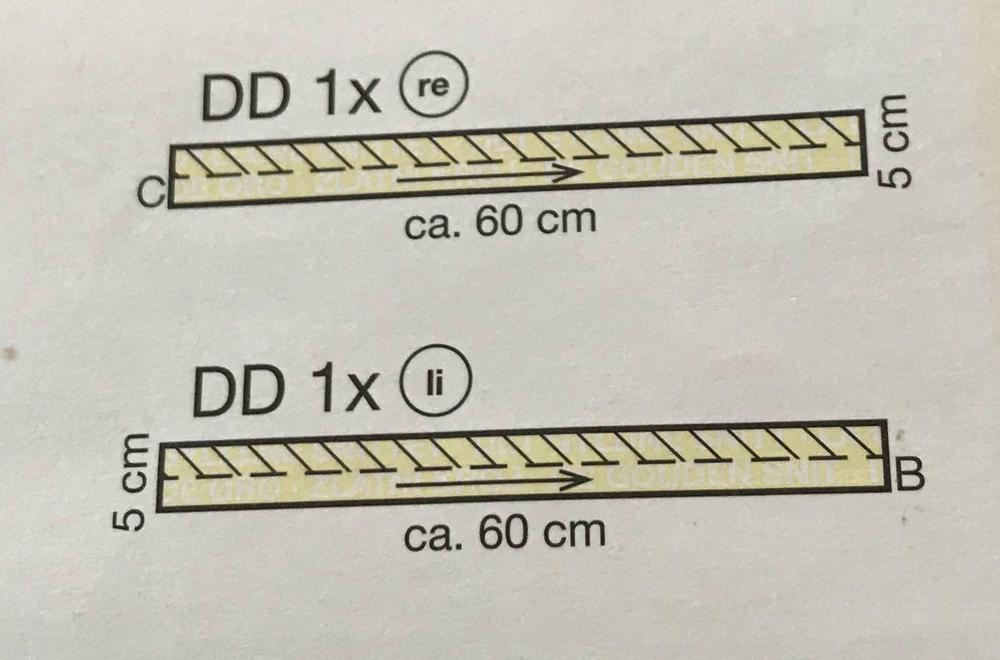 These two ties are labelled DD. On the symbols page they are called “Apron Ribbon” a not so good translation for “tie belt”. But I think you get the gist. Now there are no dots and numbers on these because the instructions really mean” make these about this wide and this long” See where is says CA 60 cm. That means somewhere around that length.
Now it also says to cut one li (left) and one re (right) again those are letters you will see on the symbols page.
Remember the Capital B and Capital C on the pattern pieces of the skirt?
When I saw these the light bulb over my head went BRIGHT. “Aha!” said I “I need to attach one ttie end at the center front where the letter C is. And the other tie end at the side seam where the letter B is. Now I know how to make the tie belt!”
So, NO, Lutterloh patterns do not have written instructions in a guide sheet. But they are certainly full of information that will help you to construct a beautiful garment.
And here is what I did with this patter.
Here is my inspiration
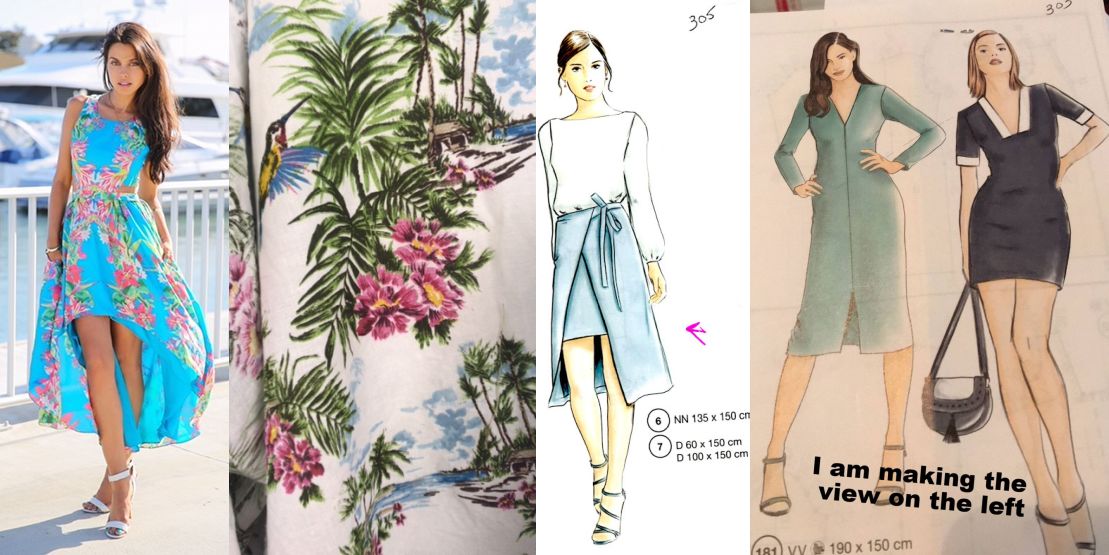 And here I am wearing the dress with the skirt overlay and it is tied nicely .
 I need to block the hem of the knit dress. But I am very please with this.
If you need more info about how to read Lutterloh patterns send me a message SusanAFogelAtGmailDotCom.


2 Comments
Claire Kennedy
April 16, 2018So I have sort of a love/hate relationship with pattern instructions – more like a hate/hate relationship. I tell most of my students, pull out the instructions so you can see all the pattern pieces you need, the layout, then fold them back up and put them away. Mostly I find that pattern instructions confuse most people. And that’s not a diss against the companies that make instructions. It’s a comment on the inherent problem with pattern instructions. One person’s good instructions will be another’s confusing one. Every teacher knows this. Teachers know that they have to have a lot of different ways to teach students or most of them won’t learn.
This works with almost every pattern I’ve worked with. There are a few newbie indie patterns that are roughly drafted that have problems with this, but for most patterns, it works. And here’s why: all the information you need is written on the pattern – things like roll lines, center front/back, notches, darts and other matching markings are all written on the pattern. That means that if you mark your pieces accordingly this won’t be a problem. Don’t remember what the markings are for, go back to the pattern piece. Don’t know what order to sew them in, go back to the pattern piece (start with #1, then work to #2, #3, etc.).
For me, I don’t use instructions and that’s what I teach students. That Lutterloh doesn’t have instructions is no barrier to using the pattern. What is so beneficial is that in the first draft, most of the time, you can come out with a pattern to cut out and go. Sometimes I will use a tissue fit to check the fit, but for the most part, the pattern works much better this way.
I will say that you have to have the experience of working with patterns, probably about 5 or 6 of them to understand the basic concept of patterns, but that’s not all that hard – it really isn’t.
Susan Fogel
April 16, 2018Claire, thank you for this comment. I agree completely with you and appreciate that you have taken the time to write such a considered comment.
Leave A Response To Susan Fogel Cancel reply